

Download SOIRTAY BLUEPRINTS: Fourth of July here.
You don’t need a caterer or a party planner to create an event that is unforgettable. You just need a little creativity and a mindset that appreciates the hundreds of different ways that a Solo cup can be transformed and cupcake foils can be twisted or balloons can be suspended. If you want a moment to feel special, you need to set that special tone.
Soirtay is full of DIY, but it’s never DIY for the heck of it; it’s DIY-FAR: Do It Yourself-For a Reason. For Soirtay, the reason we cut and glue and hang and light is to transform an everyday space into a place where a special moment will be shared. Every element has a context and a role in a Soirtay story that elevates the ordinary, with a high-heeled hostess right at its heart.
You can take the DIY as far as it tickles you. Our role is to give you the instructions, the tools and materials so you never break the bank or your back. You host. We toast. Cheers.

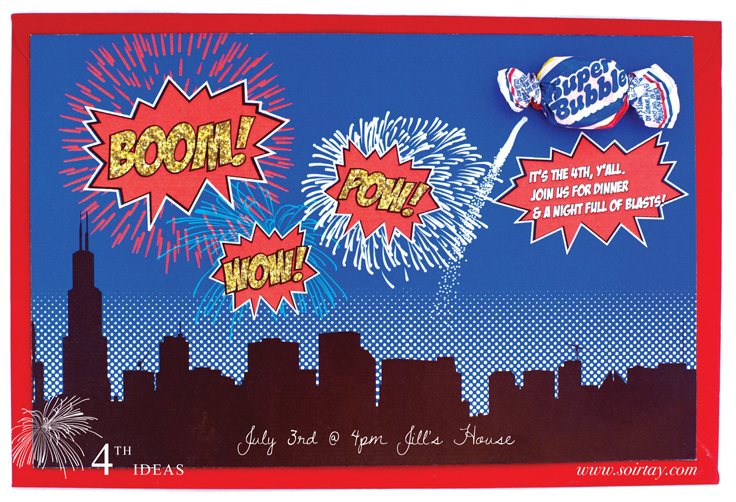
Set the tone for this 4th soirtay with an invitation that literally pops off the page. Blending references to Roy Lichtenstein’s Pop Art as well as the nostalgic Super Bubble gum we once gathered from the curb of the holiday parade, your friends and family are sure to digest the festive tone as soon as they open their envelopes.
MATERIALS (~$13)
- Ultra Fine White Paint Sharpie
- Super Bubble Gum (1 per invite)
- Glue Dots
- Olfa Blade & Cutting Mat
- Metal Ruler
- 8″X11” White Cardstock
- A9 Envelopes (Red)

HOW TO
1 Download Boom! Pow! Wow! Invitation and print on cardstock. It is formatted to 5.5 x 8.5 which fits envelope A9. Cut template along guidelines with olfa blade and cutting mat. Don’t let the scissors tempt you.
2 Using your white sharpie, write the event details into the black cityscape. (Date, Address, Time) You may want to practice once first.
3 Flatten Super Bubble piece of gum for mailing.
4 Attach one glue dot to the flattened gum and secure to invitation at the end of the white streak.
5 Address envelopes, then stuff, seal and mail.

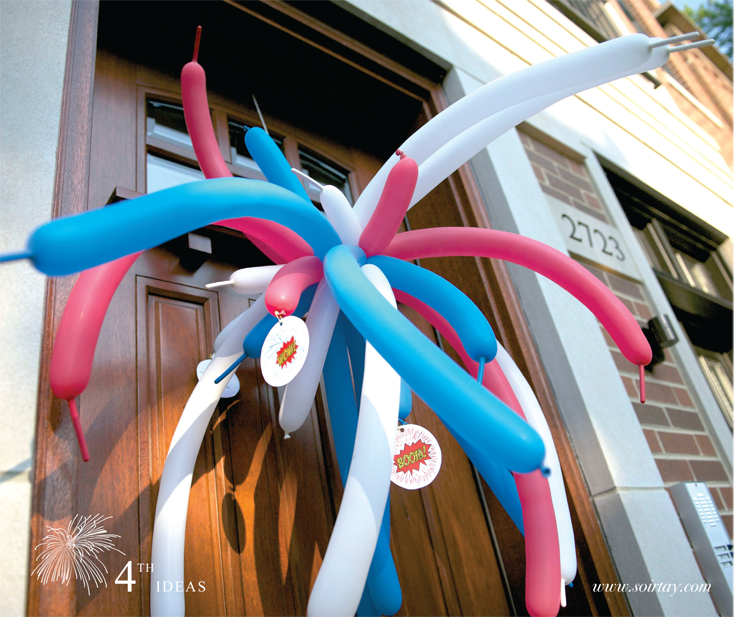
From the street or your apartment hallway, this easy piece screams WELCOME TO THE PARTY as loudly as the fireworks it’s meant to emulate.
MATERIALS (~$10)
- 15 – 20 Red, White and Blue Twist Balloons
- Balloon Pump
- 3 Extra Small Safety Pins
- 8″X11” White Cardstock
- Scissors
- White Kitchen Twine
- Masking Tape

HOW TO
Note: On the page, this appears way more complicated than it actually is. Check out our easy peasy how-to video.
1 Download Boom! Pow! Wow! Circles and print on cardstock. Cut along dotted line. Set aside.
2 Inflate all the balloons to approximately a yard’s length, leaving a tip of approximately 2 inches. Knot shut.
3 Pair 2 red balloons and twist them together 1/3 up the balloon from the tied end.
4 Pair 2 blue balloons and twist them together from the tied end. Attach the blue pair to the red pair by twisting at the point between the segments.
5 Pair 2 white balloons and add to bundle.
6 Attach one additional balloon of each color to the bundle by twisting it on at the same 1/3 point.

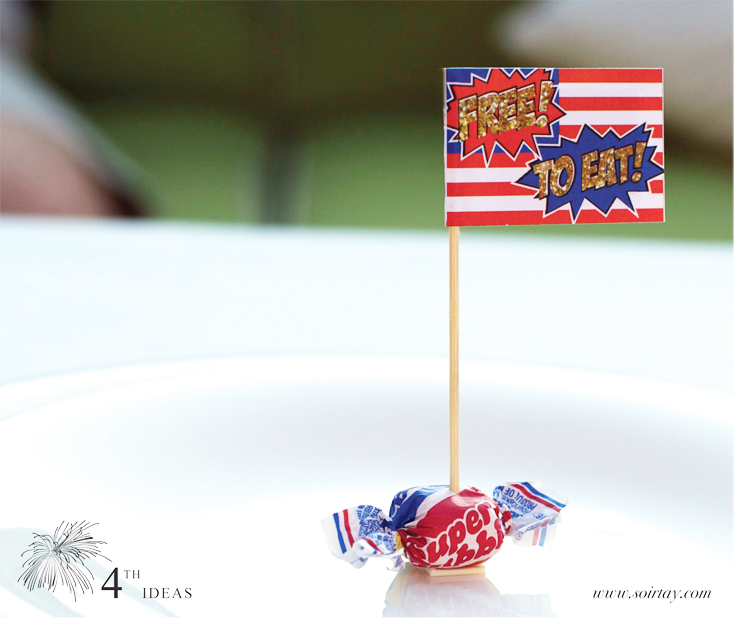
You are free to eat! The message is clear. But what you don’t see are the Independence Day trivia questions on the back. It’s a fun (and edifying) entrée into conversation before the entrée is served. Don’t forget to print the answers or put them into your smartphone.
MATERIALS (~$2)
- Super Bubble Gum (1 per guest)
- Toothpicks
- 8″X11” White Cardstock
- Scissors OR Olfa Blade & Cutting Mat & Metal Ruler
- Glue

HOW TO
1 Download Free to Eat! Flags and print on cardstock. Cut out flags and trivia questions.
2 Lightly score left side of flag, bend, and glue to toothpick
3 Fold trivia questions and glue to back of flag.
4 Stick toothpick in Super Bubble.


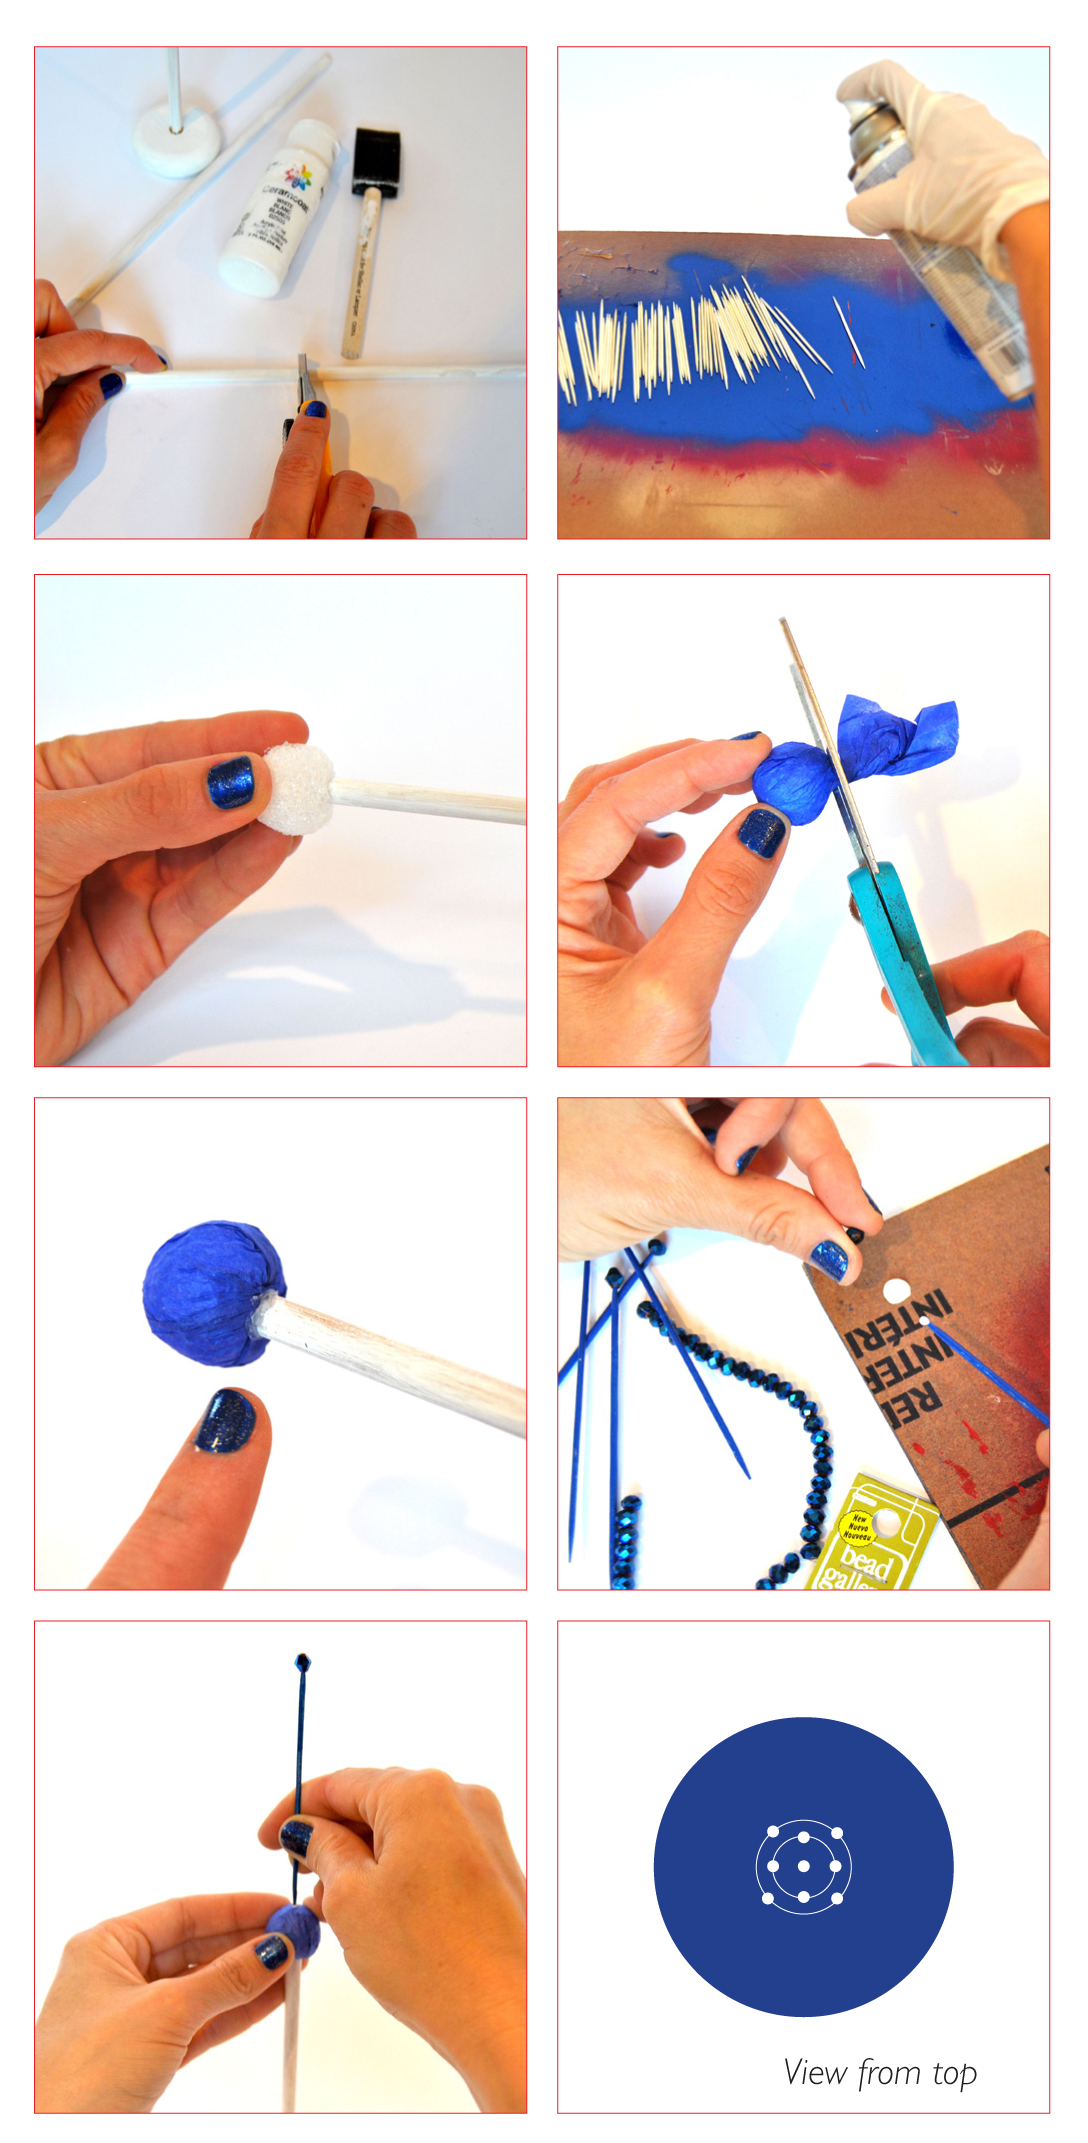
Drawing inspiration from both of these pieces below (from Design Within Reach and Dwell Stduio, respectively), this centerpiece brings a 60-esque mod to your dinner table and continues the tone set by the Lictenstein-alluding Pop Art invites.

MATERIALS (~$35 for quantity of 7)
- 1 1-in Styrofoam Ball
- 30 3-¾” Toothpicks
- 30 6mm Sparkly Beads in Red, Gold or Blue
- Gold, Red and Blue Spray Paint
- ¼” Dowel Rod (vary lengths from 8–11″)
- White Paint
- Elmer’s Glue
- 1 Olfa Blade (see picture 1)
- Tissue Paper in Red, Gold & Blue
- 1 Toy Wheel
HOW TO
Note: Directions are per firework.
1 Cut dowels to varying lengths between 8 – 11″ using an Olfa Blade. Paint dowels and toy wheel bases white. Once dry, insert dowel into base.
2 Spray paint 30 toothpicks gold, red, or blue. Toothpicks are light so spray from afar against a piece of cardboard. To cut down on mess, wear a latex glove and roll toothpicks in extra spray paint to get an even coat. Let dry in singular layer.
3 Insert dowel 1/4″ into foam ball to pre-form the attachment hole.
4 Cut a 4″ square of tissue paper. Wrap around ball and cut at base.
5 Put a dab of Elmer’s glue at end of dowel and insert into pre-holed tissue-covered foam ball.
6 Roll toothpick point in hot glue and attach sparkly bead.
7 Dab non-sparkly toothpick end in glue and insert into foam ball at top.
8 Build first two “circles” per diagram. Continue inserting toothpicks as you rotate foam ball looking for openings. Alternate so that no two toothpicks are directly in line. Note: On the page, this appears way more complicated than it actually is. Check out our easy peasy how-to video.

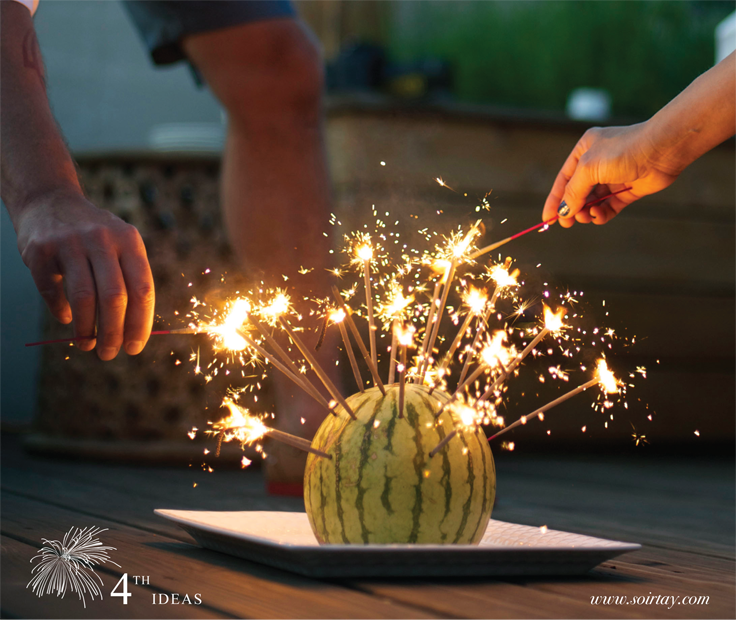
Watermelons and sparklers—nothing is more Fourth of July. This project combines the two and becomes a small scale fireworks event for your guests. You can even make it a competition to inspire pairs to put on their design hats. This is truly a doable-oomph that will sparkle in memories for years to come. That’s why we call it do-a-oomph!
Oh and don’t worry about setting the neighborhood on fire; the WATERmelons serve double purpose as the structural base and safety measure. If you’re still fretting, keep a watering can on hand just in case.
MATERIALS (~$10 per Watermelon Sparkler-work)
- 3 Packages of Gold Sparklers (Qty. 8 sparklers per pkg)
- 1 Mini Watermelon
- Hammer
- 1 Large Nail
- 2 Utility Lighters

HOW TO
Note: This is per watermelon sparkler-work.
1 Slice bottom of watermelon so that it stands on its own.
2 Scoop out and reserve watermelon insides for watermelon vinagarette and watermelon sparkler drinks. [See Menu]
3 Dry inside of watermelon with paper towel.
4 Use hammer and nail to design “firework” pattern on watermelon.
5/6 Insert sparklers into holes in any pattern.
7 Light outside to bring your watermelon firework to life! We found it easier to have two people light from opposite sides as the sparklers light quickly.
